
Every van or boat owner likes to add something to their vehicle to make it feel unique and different from all the others. This can be done with a new paint job, a vinyl wrap, or, in our case, vinyl decals that we made ourselves.
Background
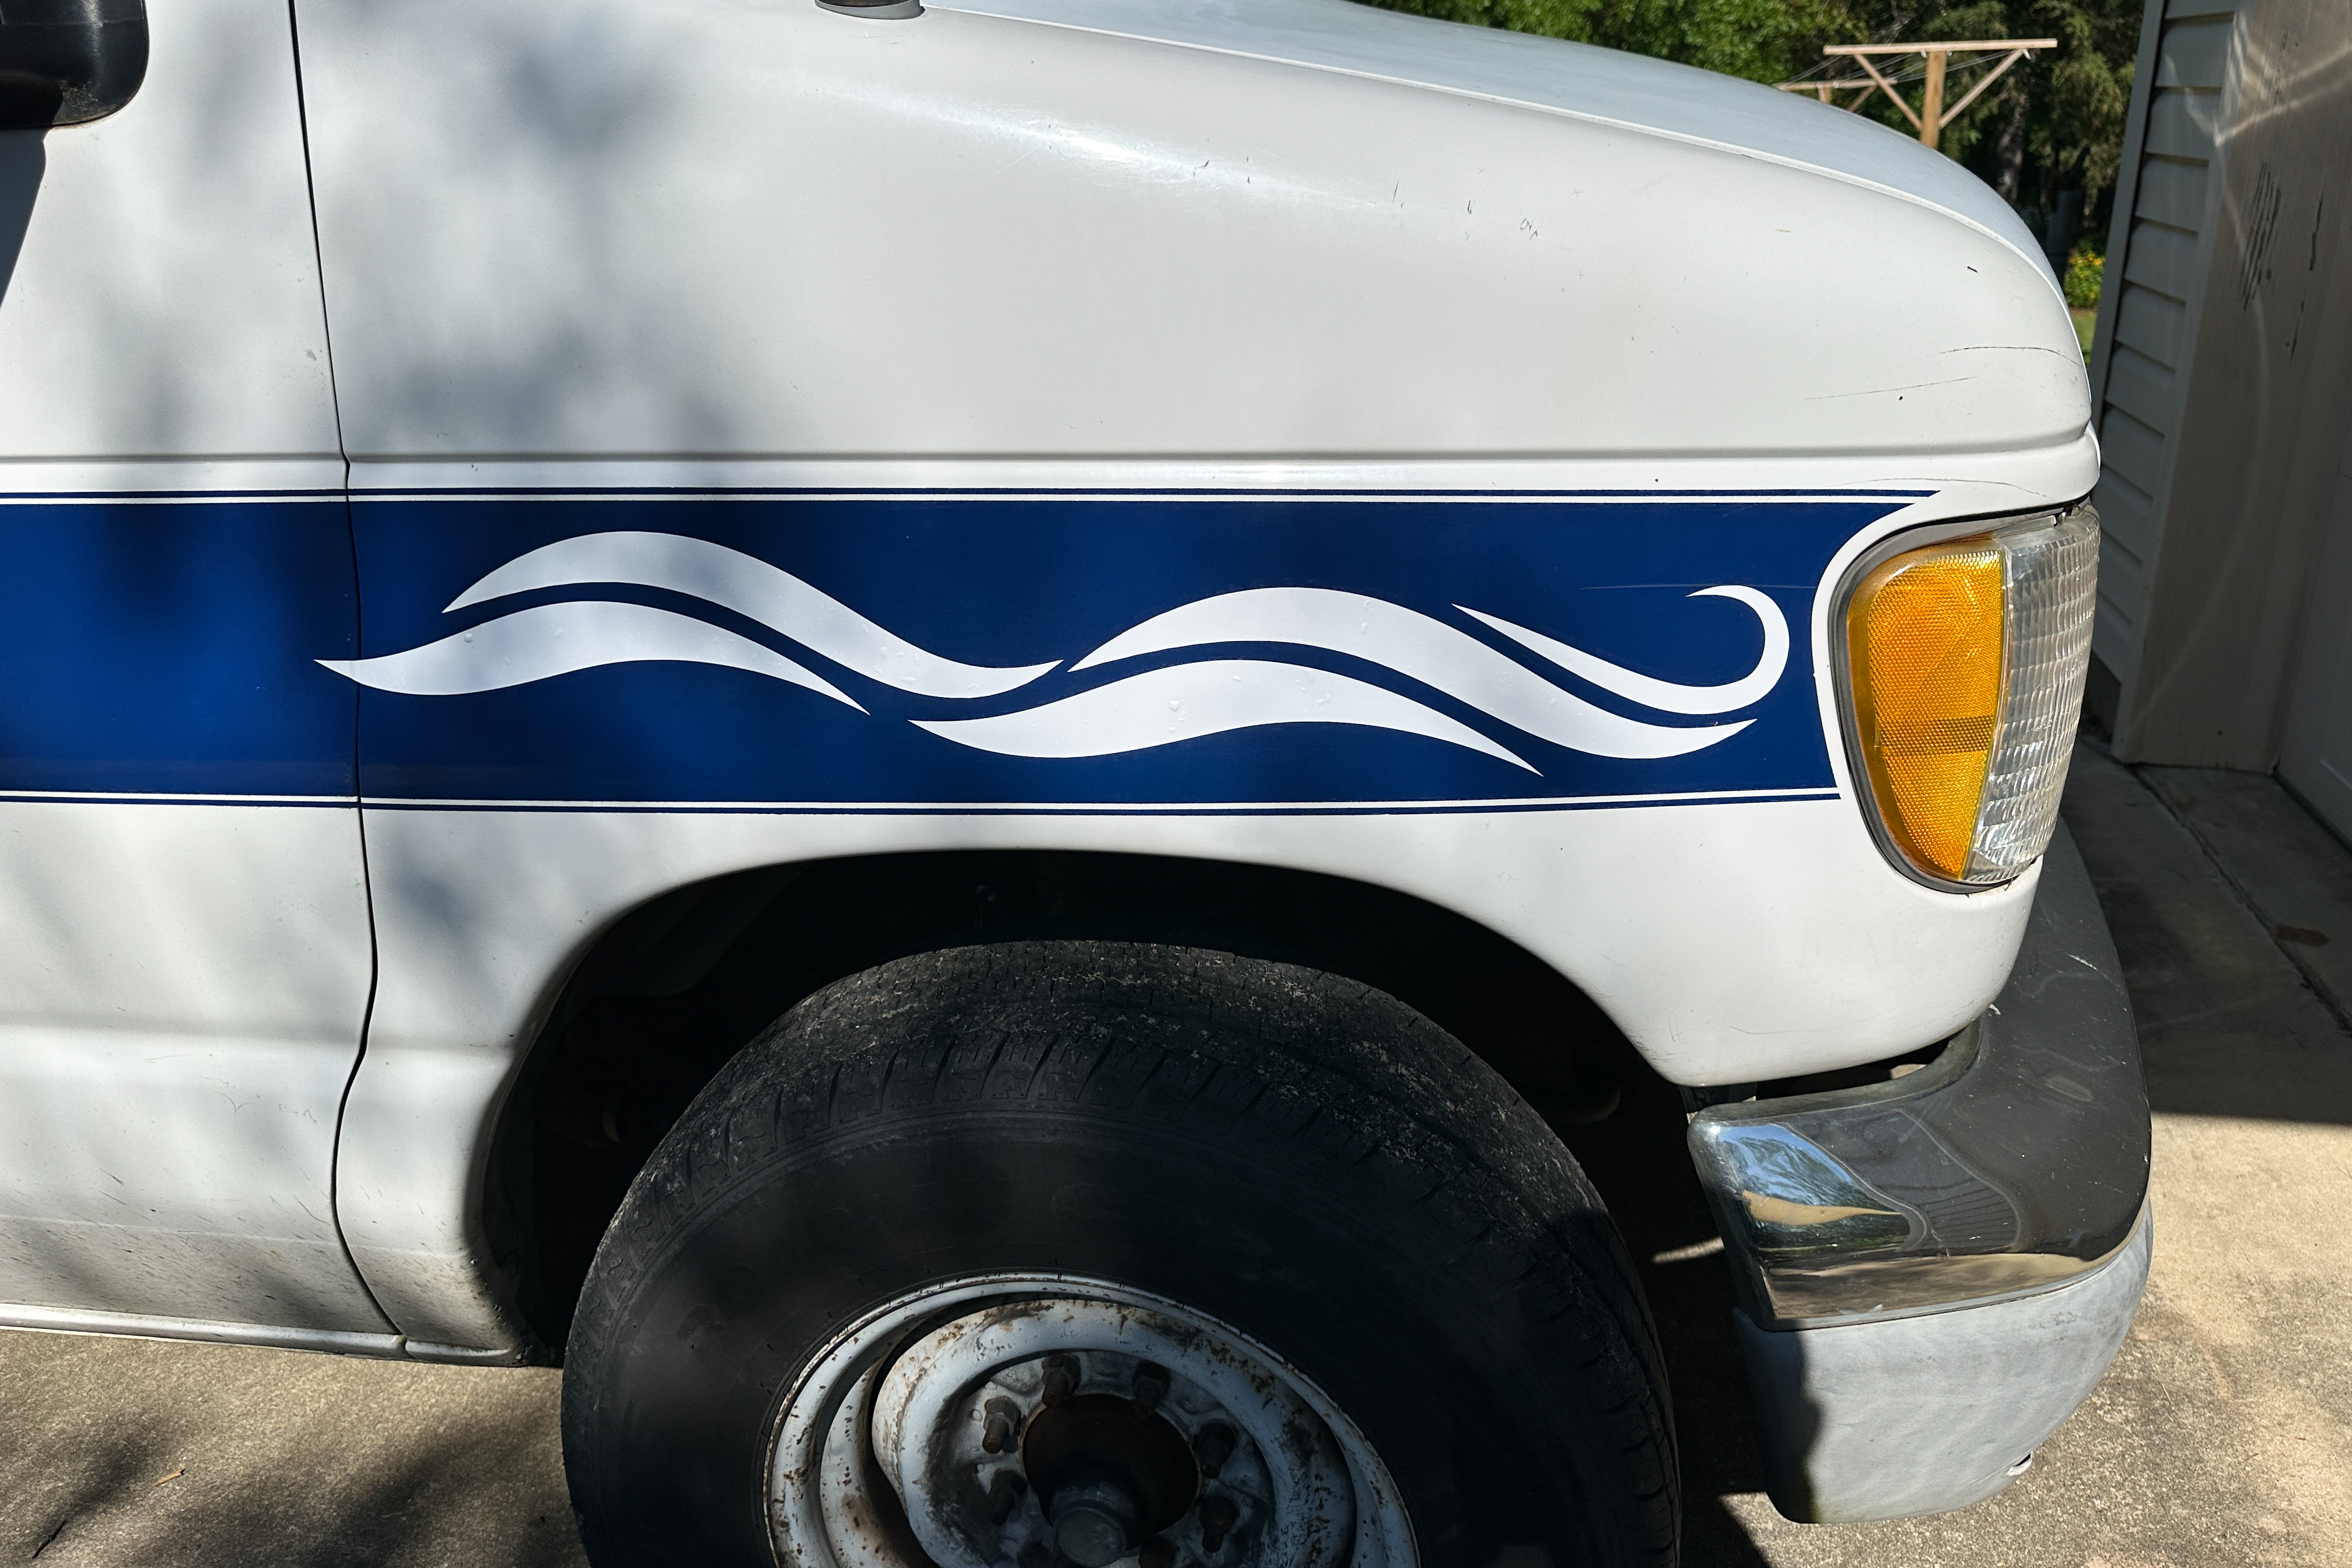
We purchased Loki from Scott’s sister when her growing family decided it was time to move to a larger vehicle with more seating capacity. Once we removed all the seats, we knew we wanted to make Loki look and feel less like their van and more like ours. Since we love both land and water adventures, we decided to use the blue stripe as a waterline of sorts and adorn it with flowing waves.

How it was done
We are fortunate to own a Cricut Maker 3 machine, so we knew we could easily make our own vinyl decals. After searching the internet for variations of the word “wave,” we narrowed it down to the design you see below. The wave pattern on the front quarter panel is the complete file that we downloaded for free and then cut from vinyl.

Cutting the Vinyl
The Cricut machine requires an .svg file format for cutting, so we used a website to convert the .jpg we downloaded into an .svg that we could use on our machine.
We used Oracal Permanent Vinyl and the default settings for the Maker 3 for permanent vinyl. Since this vinyl required a mat to cut, we taped two mats together to provide the Maker with enough length to cut the entire file. We cut both the original and mirror images multiple times, giving us many waves to arrange when fitting them together on the van’s sides and back.

Video of Waves Application
Starting at the front of the van on both sides, we did the application over a three day period due to the ridiculous heat here in the South that makes working outside in mid-day virtually impossible. When we applied the waves, we found it much easier to use the transfer tape (the clear tape you see in the video) and a bottle of soapy water to generously spray on the surface before application. This allowed for easier adjusting of placement before the waves adhered for good.

2 responses to “Adding Waves to the Side of the Van”
[…] decals to the blue stripe that runs almost entirely around the van. You can also see the first post Adding Waves to the Side of the Van which is where we started this […]
[…] Loki ours, we had to alter its look and feel both inside and out. You can also see the first post Adding Waves to the Side of the Van and then Adding More Wave Decals to the Van which is where we started this […]