
This is part of our ongoing installation of the AC, which started with Making an AC Frame for Dometic FreshJet 3 and the Review on How to Install a Dometic SmartStart Accessory Kit. Today, we had to wire the inside of the van to accept the 120V power from the source and then transfer it to the AC unit itself. There are so many different ways to wire a van or RV (when you are doing it yourself) that at some point, you just have to get in there and start. The options, of course, are to use only a 120V supply or to have a dual power system that uses both 120V and 12V, depending on the situation.
If we were living in a climate farther north, like in Colorado or Canada, we would probably just wire the entire van for 12V with solar and lithium batteries. However, down in the South, you need an air conditioner, which means you need a solid 120V power supply. There are various options for running an air conditioner off a 12V system with solar panels, but they don’t provide a consistent and secure source of power to run a 15,000 BTU air conditioner for 8-10 hours at a time.
The only reliable option right now would be the Dometic RTX 2000 Air Conditioner, which runs at only 6,824 BTUs (not to mention it costs $2,400) and requires a heavy recharge on a battery bank. This would work perfectly if you were a long-haul trucker with a massive alternator plugged into the battery bank, but for a conversion camper van, not so much.
So, for our van, we are running 120V shore power into a four-bank breaker box. One breaker will run the AC unit, and the other three will run various outlets. To start, our van still has the auxiliary AC, which we decided to keep, but we had to work around it. The auxiliary AC only works when you are driving the van and works in conjunction with the dash AC/heat. We decided to make a manifold out of PVC pipe and route it above the bed so the air would heat and cool the back (above bed) area. This also gave us room to make a breaker box panel in front of the air return.


Once the AC was out of the way, it was time for the breaker box and wiring run. If you were building this van from start to finish and not using it while you were building it, you would run these 120V wires first while the van is bare on the inside. However, we are building and using the van simultaneously, so the wires came now. This made it more difficult to run them behind the walls, but we knew that was going to be the case.


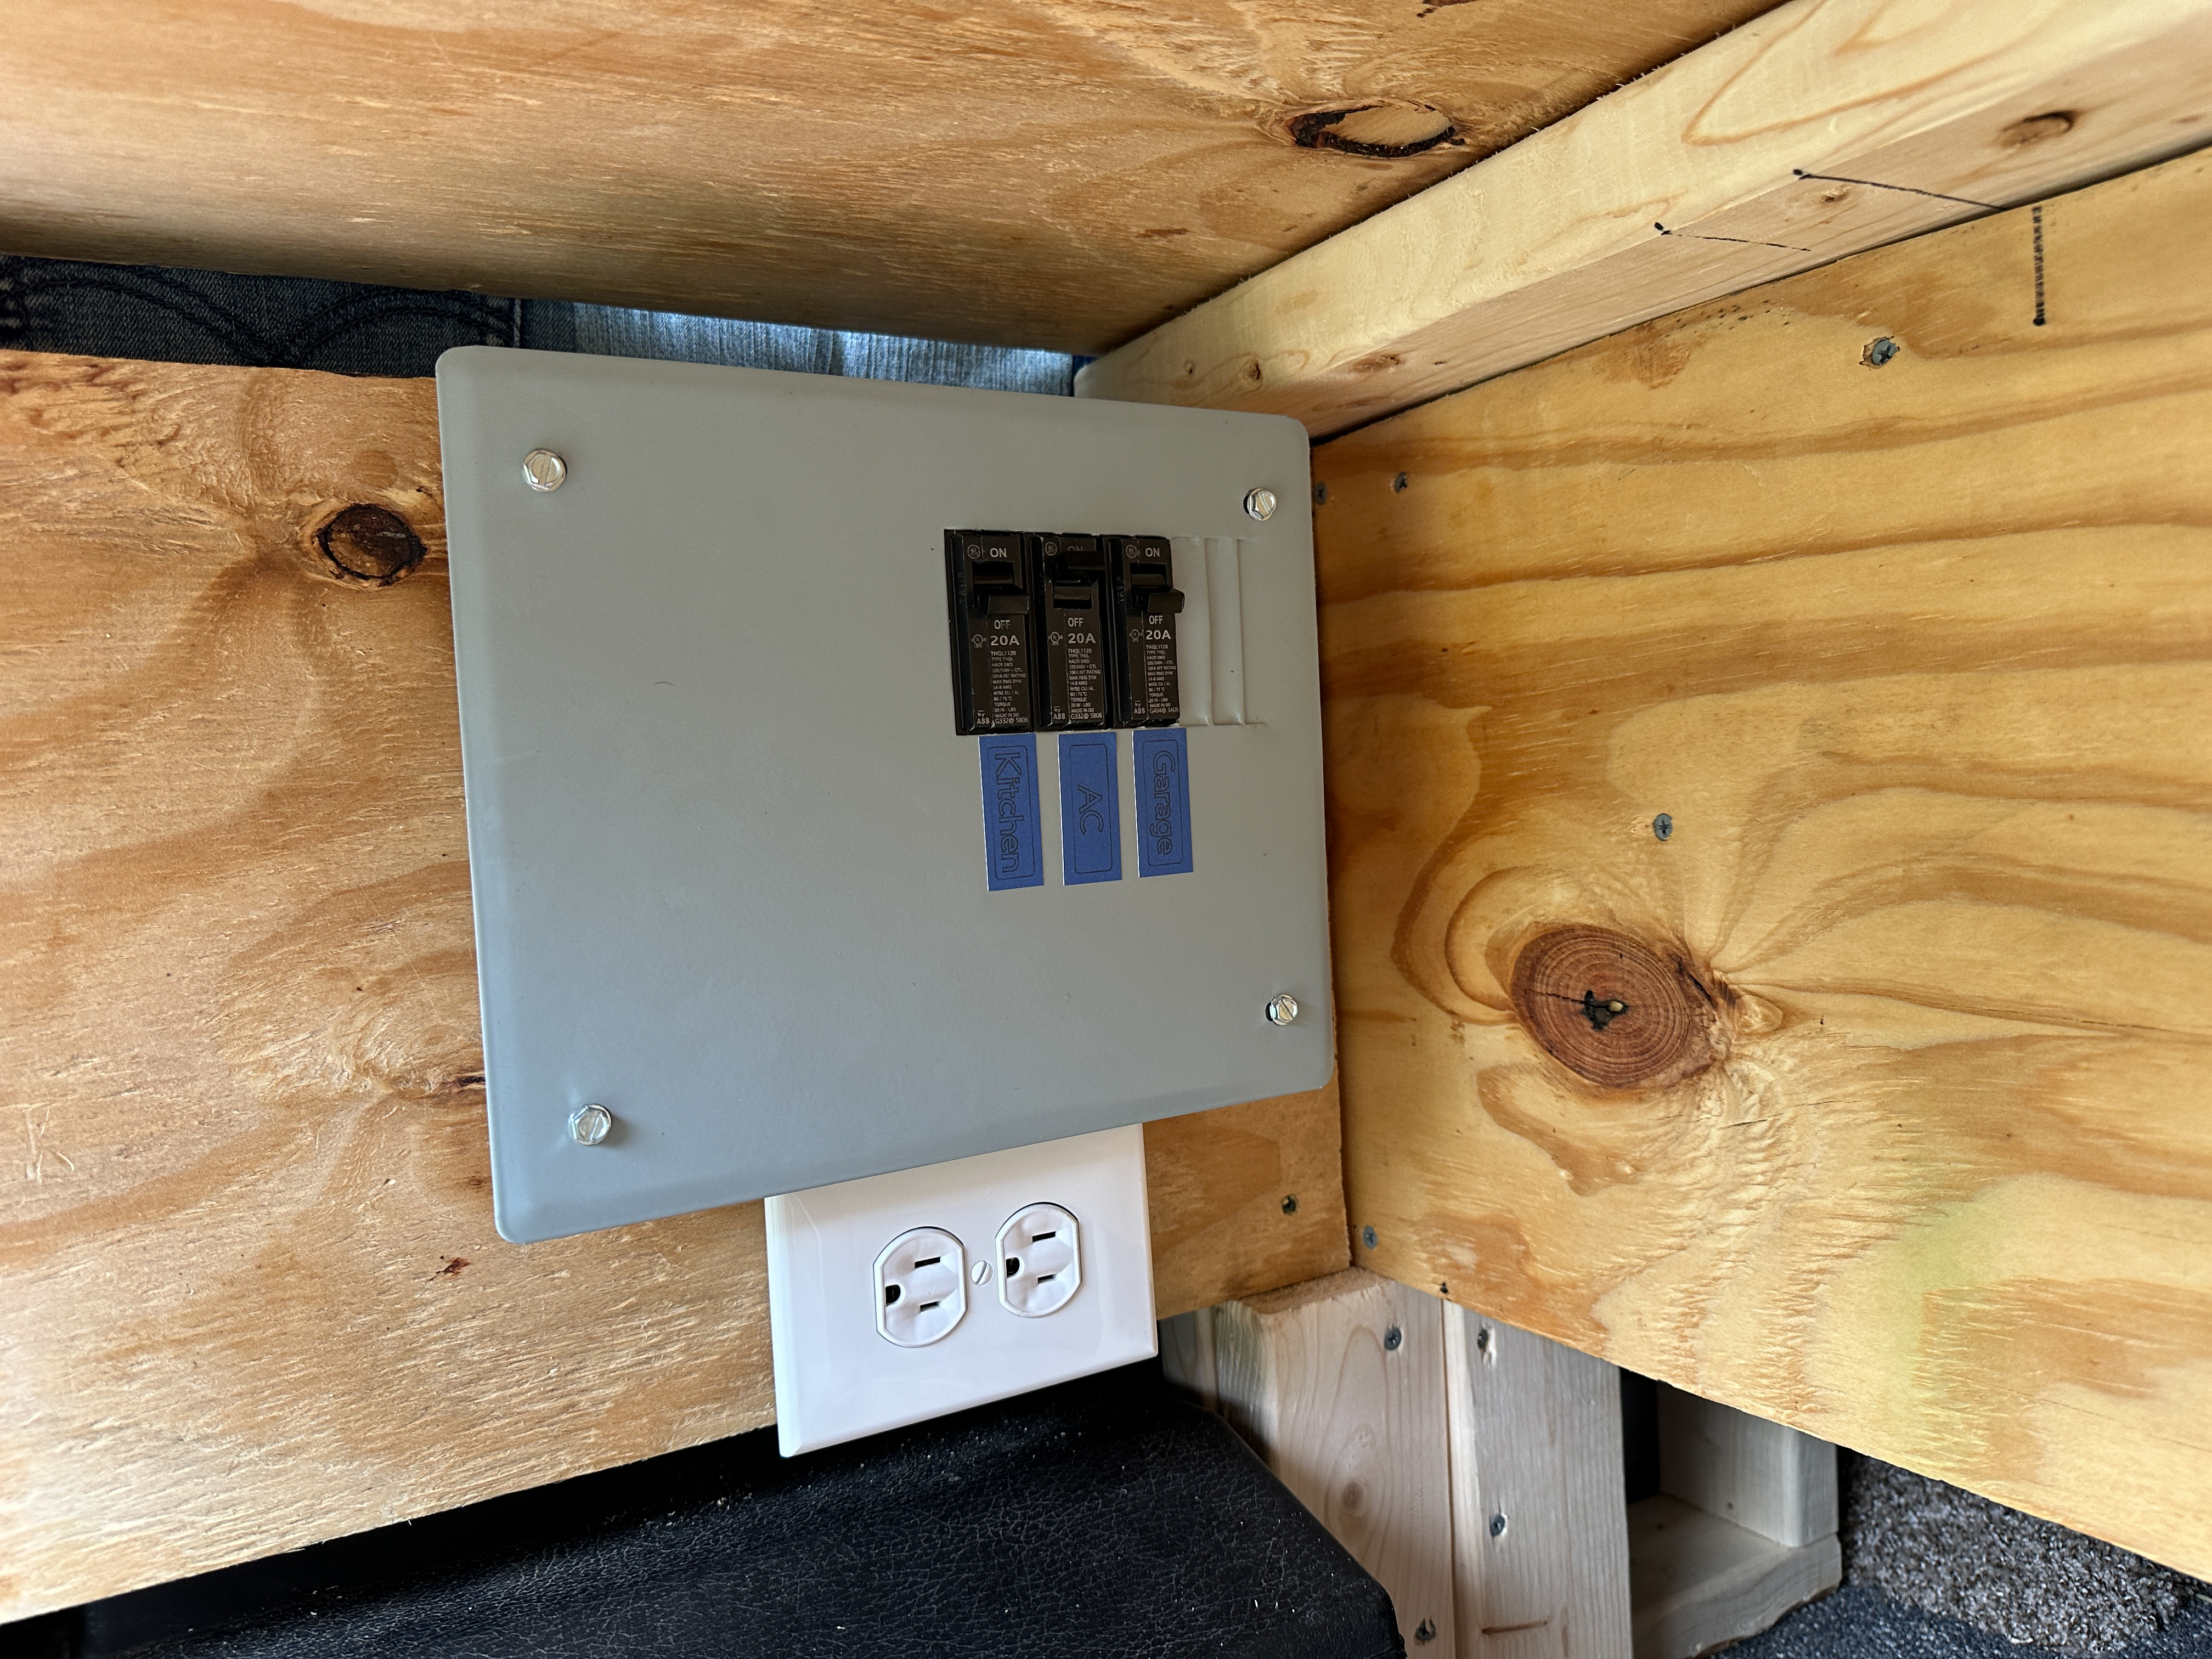
This is a closer look at the breaker box and the wiring. We are clearly not a professional RV van conversion company, we are do it yourself hacks, shanty builders, so the practical use and functionality part comes first and the finesse and making it look nice comes later.


Below you can see the finished wiring box with three breakers. For now we have a 120v standard outlet in the trunk garage area and one in the front that will power the refrigerator at some point (probably an Iceco unit). The shore power connection was run under the van and outside, so we now have the option to connect to a standard outlet at a campground or a house, or to a generator to power everything inside, including the 15,000 BTU air conditioner we are installing next.


This may not win us any beauty contests in van building, but it will certainly be adequate to keep the inside van temperatures at a comfortable level. Right now, with all the windows covered and dark, the inside of the van gets to about 125° at mid-day. The new AC unit should keep it nice and cool at night, and more than bearable during the day until winter gets here and we get a reprieve from the heat.

2 responses to “Installing Shore Power for the Camper Van”
[…] that we have dealt with the ceiling thickness issue, and installed all the shore power connections, we are ready to install the FreshJet 3 AC unit in the van. This unit actually comes in three […]
[…] would have to wait for the funds to accumulate. We were able to install the air conditioner and shore power in Loki before taking a short break to save for the next […]